If you’ve ever bought a set of clip-in hair extensions and ended up with visible wefts, slipping clips, or an obvious line between your natural hair and the extension, you’re not alone, installation is where most people get it wrong.
The good news is that getting a secure, natural-looking result doesn’t require a salon appointment. With the right sectioning, clip placement, and blending technique, you can install them yourself and create a seamless finish. In this guide, we’ll walk you through how to install clip-in hair extensions step by step, including common mistakes to avoid and tips for making them look and feel natural.
What Are Clip-In Hair Extensions?
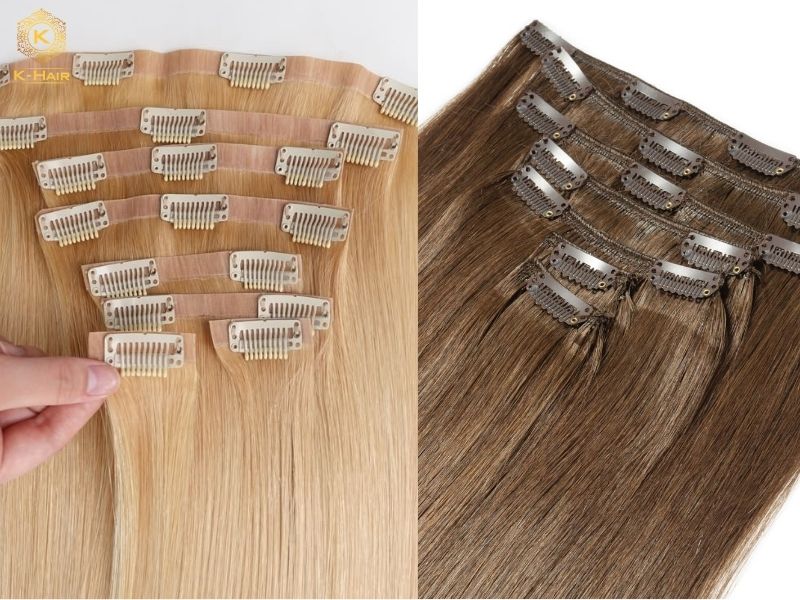
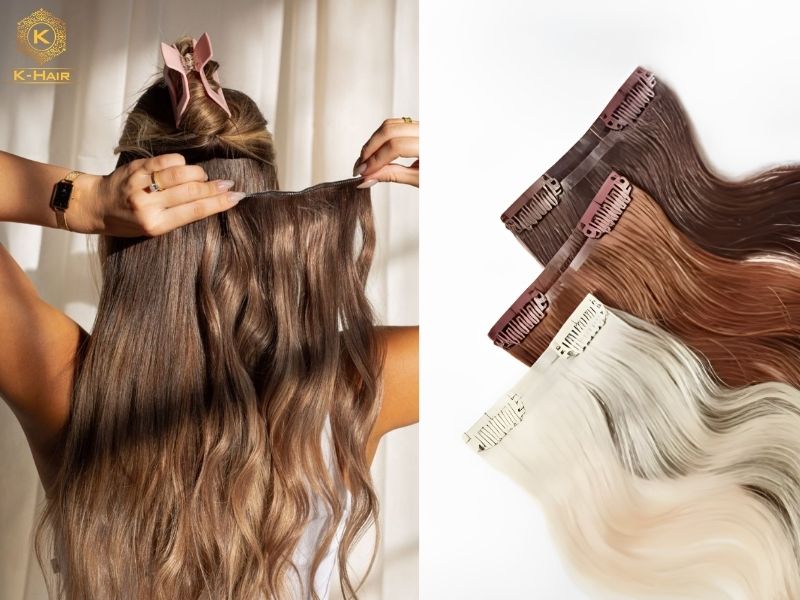
Clip-in hair extensions are wefts of hair fitted with pressure-sensitive clips that snap onto natural hair without glue, heat, or professional tools. Each weft holds a row of hair strands sewn or bonded along a narrow base, with several clips spaced evenly across it to distribute weight and hold. The clips stay closed through spring tension built into the metal band, which is what allows them to be opened and snapped shut repeatedly without losing their grip
Clip-ins are popular because they’re temporary, reusable, and don’t require a salon appointment. You can put them in before an event and take them out the same night. But a secure, natural-looking result depends on technique, where you section your hair, how you place each weft, and how you blend the top layer. (For a side-by-side look at how clip-ins compare to other methods, see types of hair extensions.)
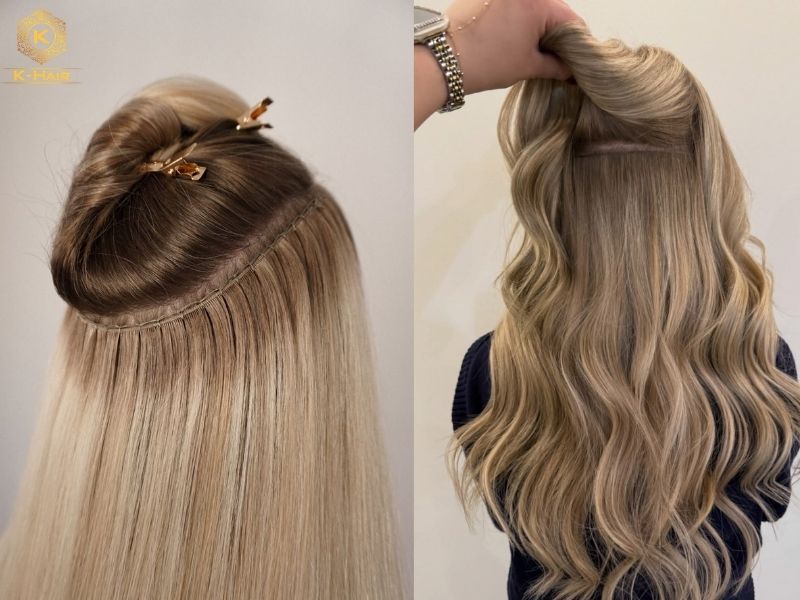
What you need before installing clip-in hair extensions
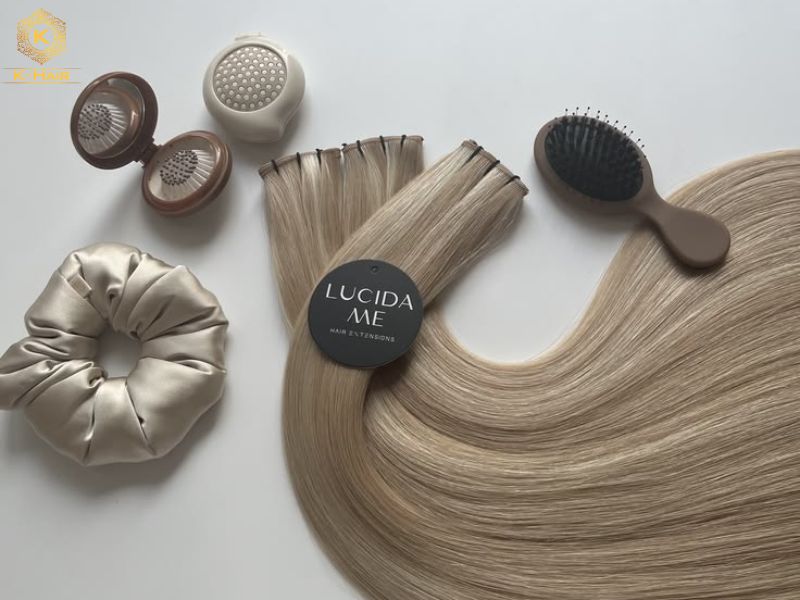
Before you start sectioning and clipping, a few basics make the whole process faster and reduce the chance of damage:
- Clip-in hair extension set: typically 7 to 10 wefts per set, with a total weight of 100g to 220g depending on the desired volume
- Tail comb or sectioning comb: for creating clean, straight partings
- Hairbrush: a loop or paddle brush works best for blending
- Hair clips or claw clips: to hold sectioned hair out of the way
- Mirror: ideally a handheld mirror plus a wall mirror, so you can check the back of your head
- Optional: hairspray, texturizing spray, or a heat tool if the extensions are heat-safe
Before you start, make sure the extensions match your natural hair color, length, and texture. A weft that’s a shade too light or a texture that’s noticeably straighter or curlier than your own hair will be the first thing people notice, regardless of how well it’s installed. (See how to choose hair extensions like a professional for a full matching checklist.)
How to Install Clip-In Hair Extensions
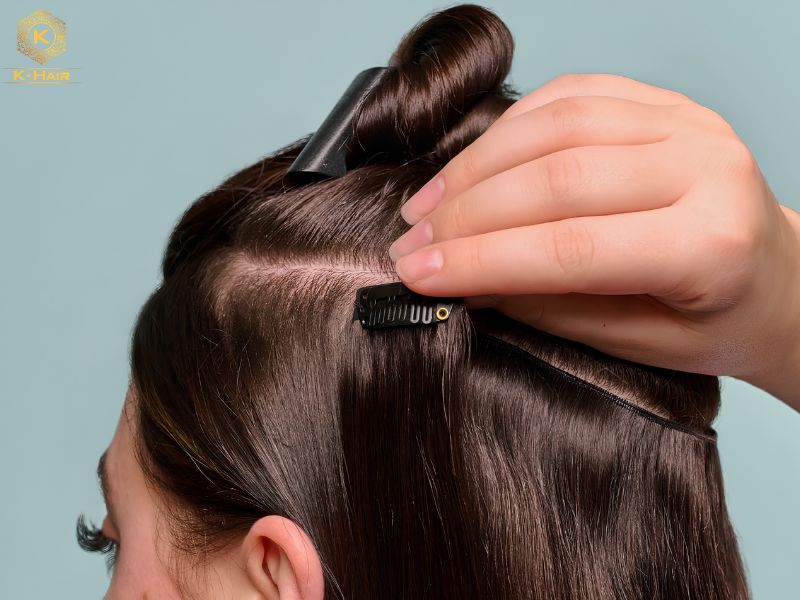
To install clip-in hair extensions, section your hair horizontally starting at the nape, tease the roots lightly for grip, and snap the clips shut moving from the smallest wefts at the bottom upward to the crown. Follow these steps to create a secure and natural-looking result:
| Step | What to Do |
| 1. Create the First Part | Create a clean horizontal part about two inches above the nape. Clip the rest of your hair up and out of the way |
| 2. Tease the Base | Gently tease the roots along the part to give the clips a secure base. |
| 3. Position the First Weft | Open the clips and place the weft close to the roots, but not directly against the scalp. Center it across the section. |
| 4. Secure the Clips | Start with the middle clip, then secure the clips on both sides. Make sure the weft feels secure without pulling on your scalp. |
| 5. Add the Remaining Extensions | Release another section above the first weft and continue upward. Use wider wefts at the back and smaller pieces around the sides. |
| 6. Blend the Extensions | Release your natural hair and brush it over the wefts. If the extensions are heat-safe, style both your natural hair and extensions together for a smoother blend. |
| 7. Check the Final Look | Check your hair from the front, sides, and back. Look for visible clips, exposed wefts, or uneven blending and adjust as needed. |
If you notice a problem, adjust the individual weft before finishing your style.
How Many Clip-In Extensions Do You Need?
The number of wefts you need depends mainly on your natural hair thickness and the result you want.
If you only want a little extra volume or length, a smaller set may be enough. If you want more length and volume, you may need a fuller set.
| Hair Type | Wefts Needed | Approx. Total Weight | Recommended Set Size |
| Fine hair | 5-7 wefts | 100g-125g | Half set |
| Medium hair | 7-9 wefts | 140g-180g | Standard set |
| Thick hair | 9-10 wefts | 180g-220g+ | Full set |
Fine hair usually works better with lighter wefts. Heavy extensions can be harder to hide and may put more weight on the roots.
Thick hair may need more wefts because there is more natural hair to cover the extension seams. If your hair is both thick and short, one full set sometimes isn’t enough volume to blend evenly – combining two half sets can work better than forcing a single set to stretch across more area than it’s built for.
Where Should You Place Clip-In Hair Extensions?
Different areas of your head need different sizes and placements. Using the right weft in each area can help create a more even blend. A standard 7-to-10-piece set is usually organized by clip count per weft, matched to how much width each zone needs:
- Nape: Use smaller or medium wefts because there is less hair to cover the clips.
- Back of the head: One or two 4-clip wefts go here for maximum width and volume, since hair density is usually highest in this area.
- Lower back and crown: Two or three 3-clip wefts work well to build height without excess bulk.
- Sides, above the ears: Two or three 2-clip wefts add length or volume without creating too much bulk.
- Front and face-framing areas: Two to four 1-clip wefts blend the smallest, most visible sections, since this area is easiest to see.
Avoid placing clips too close to the front hairline. There may not be enough natural hair in this area to cover the wefts properly. Hair density is naturally lower along the front hairline than at the back of the head, which is why clips placed too close to the front are more likely to show.
Keeping the extensions slightly farther back gives your natural hair more coverage and helps create a cleaner finish.
How to Make Clip-In Hair Extensions Look Natural
A few simple details can make clip-in extensions look much more natural.
First, choose extensions that closely match your natural hair color. Also consider the texture of your hair. For example, very straight extensions may be difficult to blend with naturally wavy hair. Hair texture affects how light reflects off each strand, which is why a texture mismatch can be visible even when the color match is exact
Make sure the top edge of each weft is covered by your natural hair. Avoid leaving the weft exposed near the surface.
You can also style your natural hair and extensions together. Curling, straightening, or waving both layers can help them move in the same way.
Try not to place too many wefts in one small area. Too much hair in one section can create visible bulk.
Common Mistakes When Installing Clip-In Extensions
Knowing the most common mistakes can help you get a better result, especially if you are installing clip-ins for the first time.
- Attaching clips to too little hair: The clips may not have enough hair to hold onto, causing the weft to slip.
- Placing clips too close to the scalp: This can make the extensions uncomfortable and put extra tension on the roots.
- Installing extensions too high: There may not be enough natural hair above the weft to cover it.
- Using extensions that do not match your natural texture: A texture mismatch can make the extensions look obvious.
- Skipping the blending step: The extensions may look like a separate layer instead of part of your natural hair.
- Using too many wefts in one area: This can create extra bulk and uneven thickness.
- Sleeping or swimming with extensions in: Keeping them in during these activities can put extra stress on the extensions and natural hair.
Manufacturer’s Insight: Weft thickness can affect how easily extensions sit and blend with natural hair. Thinner wefts usually sit closer to the head and may be easier to hide. Thicker wefts can create more bulk if there is not enough natural hair to cover them. If a weft keeps showing even after you adjust its position, the thickness of the weft may be part of the problem.
→ Read more: Hand Tied vs Machine Weft: The Real Differences? (2026)
How to Remove Clip-In Hair Extensions
To remove clip-in hair extensions, gently snap open each individual metal clip by pressing the sides, lift the weft away from your natural hair without pulling, and finish by brushing your hair to clear any tangles:
- Locate the wefts: Start at the top of your head or the nape of your neck, using your fingers or a comb to part your hair and find each hidden clip.
- Snap open the clips: Press gently on both ends or sides of a clip so it pops or clicks open.
- Slide out the piece: Lift the open clip away from the root and gently slide the weft out of your hair. Never pull or tug while the clip is still closed.
- Repeat upward: Work your way through all the sections until every weft is out.
- Brush your hair: Gently brush your natural hair to remove any minor tangles or loose shed hairs.
How to Care for Clip-In Hair Extensions After Installation
Good aftercare can help your clip-in extensions stay in better condition for longer.
Brush the extensions gently, starting from the ends and working upward. This helps reduce tangling and stress on the weft. (See how to keep hair extensions from tangling for a full care routine.)
Use products that are suitable for your type of extensions. Avoid applying too much product near the weft.
If the extensions are heat-safe, use styling tools carefully and avoid unnecessary heat.
Make sure the extensions are completely dry before storing them. Store them flat or secure them neatly to help prevent tangling and damage. Storing wefts while still damp can cause the base to warp, which changes how evenly the clips sit the next time they’re worn
How Long Does It Take to Install Clip-In Hair Extensions?
The installation time depends on your experience, the number of wefts, and the style you want.
If you are new to clip-ins, your first installation may take longer while you learn how to section and position each piece.
With practice, the process becomes faster.
A simple half set usually takes less time than a full set that needs more blending and styling.
FAQs About Installing Clip-In Hair Extensions
Here are some common questions people have when learning how to install them:
Can I Install Clip-In Extensions by Myself?
Yes, you can install extensions by yourself.
Use a wall mirror and a handheld mirror to check the back of your head. It may take a little longer at first, especially when you are working around the crown.
Where Should I Put the First Clip-In Weft?
Start at the nape of your neck.
Work upward in horizontal sections until you reach the crown. This helps create an even layer and makes the wefts easier to hide.
Do I Need to Tease My Hair Before Installing Clip-Ins?
Not always.
If your hair is fine or slippery, lightly teasing the roots can give the clips more grip.
If you have thicker hair, you may not need to tease it before installation.
Can I Sleep With Clip-In Hair Extensions In?
It is best to remove them before sleeping.
Keeping them in overnight can put extra tension on your natural hair and may cause discomfort.
Why Do My Clip-In Extensions Keep Slipping?
Clip-ins can slip for several reasons.
Fine or freshly washed hair often doesn’t give the clips enough to grip onto, and too much oil or styling product near the roots makes hair slippery. Worn-out clip springs lose tension over time, and a weft that’s too heavy for the section supporting it will also slip.
→ Read more: Wholesale Clip In Hair Extensions – The Complete B2B Guide
Conclusion
With the tips above on how to install clip-in hair extensions, we hope you now have a better understanding of how to achieve a secure and natural-looking result.
For salons, retailers, and hair businesses, choosing a reliable supplier is just as important as using the right installation technique. At K-Hair Factory, we provide quality clip-in hair extensions and wholesale support to help you meet your customers’ needs.
Ready to source verified raw Vietnamese hair?
Contact K-Hair Factory directly for wholesale pricing, MOQ details, and free samples.
Or visit our Facebook: K-Hair Vietnam Factory to get the latest wholesale price list and start building your brand with confidence!